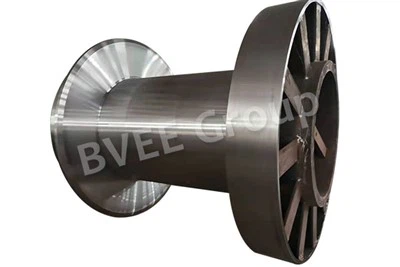
As a supplier of wheel assemblies, I often receive inquiries from customers about how to replace a wheel assembly hub. In this blog post, I'll share a detailed guide on this process, drawing on my experience in the industry. Whether you're dealing with STS Container Terminal Wheels Assembly, Wheel Hub Assemblies, or Catenary Cranes Wheels Assembly, the general principles remain largely the same.
Understanding the Wheel Assembly Hub
Before delving into the replacement process, it's crucial to understand what a wheel assembly hub is and its role. The wheel hub assembly is a crucial component that connects the wheel to the vehicle or equipment. It houses the wheel bearings, which allow the wheel to rotate smoothly. A worn - out or damaged wheel hub assembly can lead to various problems, such as uneven tire wear, steering instability, and excessive noise.


Tools and Materials Needed
To replace a wheel assembly hub, you'll need the following tools and materials:
- Socket set and wrenches: These are used to remove and install bolts. Make sure you have the correct sizes for your specific equipment.
- Jack and jack stands: Essential for safely lifting the vehicle or equipment off the ground.
- Torque wrench: To ensure that the bolts are tightened to the correct specifications.
- New wheel hub assembly: Ensure it is the right fit for your application. As a wheel assembly supplier, I can provide high - quality and compatible wheel hub assemblies for different types of equipment.
- Brake cleaner: This helps to clean the brake components during the replacement process.
- Grease: For lubricating the wheel bearings and other moving parts.
Step - by - Step Replacement Process
Step 1: Preparation
First, park the vehicle or equipment on a flat, stable surface. Engage the parking brake and place wheel chocks on the wheels that will remain on the ground to prevent any accidental movement. It's also a good idea to put on safety glasses and gloves to protect yourself during the process.
Step 2: Loosen the Lug Nuts
Using a socket wrench, loosen the lug nuts on the wheel that needs the hub replacement. Do not remove them completely at this stage; just loosen them enough so that they can be easily removed later.
Step 3: Lift the Vehicle or Equipment
Use the jack to lift the vehicle or equipment slowly until the wheel is about 6 - 8 inches off the ground. Then, place the jack stands under the appropriate lifting points and lower the vehicle or equipment onto the jack stands. Double - check that the jack stands are stable and secure before proceeding.
Step 4: Remove the Wheel
Completely remove the lug nuts and take off the wheel. Set it aside in a safe place.
Step 5: Remove the Brake Caliper
Locate the brake caliper, which is usually held in place by two bolts. Use a socket wrench to remove these bolts and carefully lift the brake caliper off the rotor. Do not let the brake caliper hang by the brake hose; instead, use a piece of wire or a bungee cord to suspend it from the vehicle's frame.
Step 6: Remove the Brake Rotor
In some cases, the brake rotor may be loose enough to be removed by hand. If it's stuck, you can use a rubber mallet to gently tap it loose. Be careful not to damage the rotor or other components.
Step 7: Remove the Old Wheel Hub Assembly
The wheel hub assembly is typically held in place by bolts that are accessible from the back of the hub. Use a socket wrench to remove these bolts. Once the bolts are removed, you may need to use a pry bar or a hub puller to separate the hub assembly from the steering knuckle. Be gentle to avoid damaging the steering knuckle.
Step 8: Clean the Steering Knuckle
After removing the old hub assembly, use brake cleaner to clean the steering knuckle. This will remove any dirt, grease, or debris that could affect the installation of the new hub assembly.
Step 9: Install the New Wheel Hub Assembly
Carefully place the new wheel hub assembly onto the steering knuckle. Make sure it is properly aligned. Insert and hand - tighten the bolts that hold the hub assembly in place.
Step 10: Reinstall the Brake Rotor and Caliper
Put the brake rotor back onto the new hub assembly. Then, reattach the brake caliper and tighten the caliper bolts using a torque wrench to the manufacturer's specifications.
Step 11: Reinstall the Wheel
Place the wheel back onto the hub and hand - tighten the lug nuts.
Step 12: Lower the Vehicle or Equipment
Use the jack to lift the vehicle or equipment slightly, remove the jack stands, and then slowly lower the vehicle or equipment back to the ground.
Step 13: Tighten the Lug Nuts
Using a torque wrench, tighten the lug nuts to the correct torque value. This is crucial for ensuring the safety and proper functioning of the wheel.
Testing
Once the wheel hub assembly has been replaced, take the vehicle or equipment for a short test drive. Pay attention to how it drives, any unusual noises, or changes in steering feel. If you notice any problems, stop the vehicle immediately and re - check the installation.
Why Choose Our Wheel Assemblies
As a wheel assembly supplier, we offer a wide range of high - quality wheel hub assemblies, including STS Container Terminal Wheels Assembly, Wheel Hub Assemblies, and Catenary Cranes Wheels Assembly. Our products are made from top - grade materials and are designed to meet the highest industry standards. We also provide excellent customer service and technical support to ensure that you get the right product for your needs.
Contact Us for Procurement
If you're in need of a new wheel hub assembly or have any questions about our products, we encourage you to contact us for procurement. Our team of experts is ready to assist you in finding the perfect solution for your equipment. Whether you're a small business or a large - scale operation, we can provide you with the high - quality wheel assemblies you need at competitive prices.
References
- Automotive repair manuals: These are a great source of detailed information on specific vehicle models and their repair procedures.
- Manufacturer's specifications: Always refer to the manufacturer's guidelines for the correct torque values, bolt sizes, and other important details.