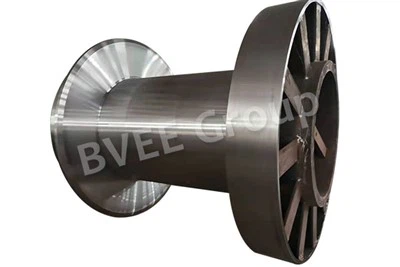
Hey there! As a wheel assembly supplier, I've seen my fair share of wheel - related issues. One common problem that comes up quite often is the need to replace a wheel assembly seal. In this blog, I'll walk you through the process step by step.
First off, let's understand why you might need to replace a wheel assembly seal. Seals are crucial components in a wheel assembly. They keep contaminants like dirt, water, and debris out of the wheel hub and bearing area. Over time, these seals can wear out due to constant exposure to harsh conditions, high - speed rotation, and temperature changes. When a seal fails, it can lead to lubricant leakage, which in turn can cause premature wear and damage to the bearings. And trust me, replacing a bearing is a whole lot more expensive and time - consuming than replacing a seal.
Tools You'll Need
Before you start the replacement process, gather the necessary tools. You'll need a socket set, a seal puller, a hammer, a flat - tip screwdriver, a torque wrench, and of course, a new wheel assembly seal. Make sure the new seal is the right size and type for your wheel assembly. You can find the specifications in your vehicle's manual or by contacting us as a wheel assembly supplier. We can provide you with the exact match based on your requirements.
Step 1: Prepare the Vehicle
Park your vehicle on a flat, level surface and engage the parking brake. If you're working on a car, you might also want to place wheel chocks behind the wheels that you're not working on for added safety. Loosen the lug nuts on the wheel with the damaged seal, but don't remove them just yet. Then, use a jack to lift the vehicle until the wheel is about 6 - 8 inches off the ground. Place jack stands under the vehicle's frame for support and lower the vehicle onto the jack stands. Now you can safely remove the lug nuts and take off the wheel.
Step 2: Remove the Old Seal
Once the wheel is off, you'll be able to access the wheel assembly. Locate the old seal. It's usually a circular rubber or metal - reinforced component that sits in the hub. Use a seal puller or a flat - tip screwdriver to gently pry the old seal out. Be careful not to damage the hub surface while doing this. If the seal is really stubborn, you can tap the screwdriver gently with a hammer to loosen it. Once the seal is out, clean the hub area thoroughly. Remove any old lubricant, dirt, or debris using a clean rag and some brake cleaner.
Step 3: Install the New Seal
Before installing the new seal, apply a thin layer of wheel bearing grease to the sealing lip. This will help create a better seal and prevent leaks. Place the new seal on the hub, making sure it's centered properly. You can use a socket or a seal installer tool that fits the seal diameter to press the seal into place. Tap the tool gently with a hammer until the seal is fully seated in the hub. Make sure it's flush with the hub surface.
Step 4: Reassemble the Wheel
After the new seal is installed, it's time to put everything back together. Apply a small amount of grease to the wheel studs. Then, put the wheel back on the hub and hand - tighten the lug nuts. Use a torque wrench to tighten the lug nuts to the manufacturer's recommended torque specification. This is important to ensure the wheel is properly secured and to prevent uneven wear.
Step 5: Lower the Vehicle
Once the lug nuts are tightened, carefully remove the jack stands and lower the vehicle to the ground using the jack. Finally, use the torque wrench to double - check the lug nut torque.
Why Choose Our Wheel Assemblies
As a wheel assembly supplier, we offer a wide range of high - quality products. Our Wheel Hub Assemblies are designed to meet the highest industry standards. They are made from top - grade materials and undergo rigorous testing to ensure durability and performance. Whether you need a wheel assembly for a small car or a heavy - duty industrial vehicle, we've got you covered.


We also provide Overhead Crane Trolley Wheel Assembly for industrial applications. These assemblies are built to withstand heavy loads and harsh working conditions. And if you're in the port crane business, our Port Crane Spare Parts Wheel Assembly are the perfect choice. They are engineered to provide reliable operation and long service life.
Conclusion
Replacing a wheel assembly seal might seem like a daunting task, but with the right tools and a little know - how, you can do it yourself. And if you ever need help or have any questions about wheel assemblies or seals, don't hesitate to reach out to us. We're here to assist you and provide you with the best products and services. Whether you're a DIY enthusiast or a professional mechanic, we can be your trusted wheel assembly supplier. Contact us today to discuss your requirements and start the procurement process.
References
- Vehicle maintenance manuals
- Industry standards for wheel assemblies and seals