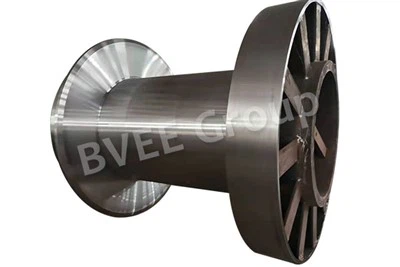
As a seasoned professional in the wheel assembly supply industry, I've witnessed firsthand the importance of maintaining and replacing wheel assembly studs when necessary. In this blog post, I'll share a comprehensive guide on how to replace a wheel assembly stud, drawing on my years of experience and expertise. Whether you're a DIY enthusiast or a professional mechanic, this guide will provide you with the knowledge and steps needed to complete the task safely and effectively.


Understanding the Wheel Assembly Stud
Before diving into the replacement process, it's crucial to understand the role of the wheel assembly stud. The stud is a threaded rod that protrudes from the wheel hub and is used to secure the wheel to the vehicle. It plays a vital role in ensuring the wheel is properly attached and aligned, contributing to the overall safety and performance of the vehicle. Over time, studs can become worn, damaged, or broken, which can lead to loose wheels, vibrations, and even accidents. Therefore, it's essential to replace a damaged stud as soon as possible.
Tools and Materials Needed
To replace a wheel assembly stud, you'll need the following tools and materials:
- Socket set
- Lug wrench
- Hammer
- Stud extractor or a large socket and a press (for removal)
- New wheel assembly stud
- Anti-seize compound
- Torque wrench
Step-by-Step Guide to Replacing a Wheel Assembly Stud
Step 1: Prepare the Vehicle
- Park the vehicle on a flat, stable surface and engage the parking brake.
- Loosen the lug nuts on the wheel with the damaged stud using a lug wrench, but do not remove them completely.
- If necessary, use a jack to raise the vehicle off the ground and support it securely with jack stands. Make sure the vehicle is stable before proceeding.
Step 2: Remove the Wheel
- Once the vehicle is safely supported, remove the lug nuts and take off the wheel. Place the wheel aside in a safe location.
Step 3: Remove the Damaged Stud
- There are two common methods for removing a damaged stud: using a stud extractor or a large socket and a press.
- Using a Stud Extractor: Insert the stud extractor into the hole where the stud is located. Follow the manufacturer's instructions to tighten the extractor onto the stud. Then, use a hammer to tap the extractor gently, applying pressure to loosen the stud. Once the stud is loose, turn the extractor counterclockwise to remove the stud from the hub.
- Using a Large Socket and a Press: Place a large socket over the stud that is slightly smaller than the head of the stud. Use a press to apply pressure to the socket, pushing the stud out of the hub. This method requires more specialized equipment and may be more challenging for DIYers.
Step 4: Clean the Stud Hole
- After removing the damaged stud, use a wire brush or a cleaning solution to remove any dirt, rust, or debris from the stud hole in the hub. This will ensure a proper fit for the new stud.
Step 5: Install the New Stud
- Apply a small amount of anti-seize compound to the threads of the new stud. This will prevent the stud from seizing in the hub and make future removal easier.
- Insert the new stud into the cleaned stud hole. Make sure the stud is aligned properly and fully seated in the hole.
- Use a hammer to tap the stud gently, ensuring it is firmly in place. You can also use a press to apply pressure to the stud if necessary.
Step 6: Reinstall the Wheel
- Place the wheel back onto the hub, aligning the holes in the wheel with the studs.
- Hand-tighten the lug nuts onto the studs. Make sure the nuts are threaded onto the studs correctly and are snug, but do not overtighten them at this stage.
Step 7: Lower the Vehicle
- Use the jack to lower the vehicle back to the ground. Once the vehicle is on the ground, use a torque wrench to tighten the lug nuts to the manufacturer's recommended torque specification. This is crucial for ensuring the wheel is properly secured and preventing damage to the studs and the wheel.
Safety Precautions
- Always wear appropriate safety gear, such as gloves and safety glasses, when working on your vehicle.
- Make sure the vehicle is properly supported on jack stands before working under it. Never rely solely on a jack to support the vehicle.
- Follow the manufacturer's instructions when using tools and equipment.
- If you're unsure about any step in the process, consult a professional mechanic.
Related Products from Our Wheel Assembly Supply
At our company, we offer a wide range of high-quality wheel assembly products to meet your needs. Some of our popular products include:
- Catenary Cranes Wheels Assembly: These wheels are designed for use in catenary cranes, providing reliable performance and durability in demanding industrial environments.
- Traveling Mechanism Parts: Our traveling mechanism parts are essential components for various types of equipment, ensuring smooth and efficient operation.
- STS Container Terminal Wheels Assembly: These wheels are specifically designed for use in STS container terminals, offering high load capacity and long service life.
Contact Us for Procurement
If you're in the market for high-quality wheel assembly products or have any questions about replacing a wheel assembly stud, we'd love to hear from you. Our team of experts is ready to assist you with your procurement needs and provide you with the best solutions for your business. Whether you're a small workshop or a large industrial enterprise, we have the products and expertise to meet your requirements. Contact us today to start a discussion about your wheel assembly needs.
References
- Automotive Repair Manuals
- Manufacturer's Instructions for Tools and Equipment
- Industry Standards and Best Practices for Wheel Assembly Maintenance