

Installing a bearing in a wire rope sheave is a crucial process that demands precision and a thorough understanding of the components involved. As a trusted wire rope sheave supplier, I've witnessed firsthand the importance of a proper bearing installation. This blog post will guide you through the steps to ensure a successful bearing installation in a wire rope sheave.
Understanding the Basics
Before we dive into the installation process, it's essential to understand the key components. A wire rope sheave is a grooved wheel that guides and supports a wire rope. The bearing, on the other hand, allows the sheave to rotate smoothly, reducing friction and wear. There are different types of bearings, such as ball bearings and roller bearings, each with its own advantages depending on the application.
Pre - installation Preparation
- Inspect the Sheave: Carefully examine the wire rope sheave for any signs of damage, such as cracks, dents, or excessive wear. If the sheave is damaged, it may need to be repaired or replaced before installing the bearing. This is crucial as a damaged sheave can cause uneven loading on the bearing, leading to premature failure.
- Inspect the Bearing: Check the bearing for any visible defects, such as rust, pitting, or loose components. Make sure the bearing is clean and free of debris. You can use a clean, lint - free cloth to wipe the bearing. Also, verify that the bearing is the correct size and type for the sheave. Using an incorrect bearing can lead to poor performance and potential safety hazards.
- Gather Tools: You will need a set of appropriate tools for the installation. These may include a press or a hammer and a set of drift punches, a torque wrench, a bearing puller (in case you need to remove an old bearing), and a lubricant. Having the right tools ensures a smooth and efficient installation process.
Removing the Old Bearing (if applicable)
If you are replacing an old bearing, you need to remove it first.
- Secure the Sheave: Place the sheave in a vice or a stable fixture to prevent it from moving during the removal process. Make sure it is held firmly but not so tightly that it damages the sheave.
- Use a Bearing Puller: Attach the bearing puller to the old bearing. Follow the manufacturer's instructions for the correct use of the puller. Slowly apply pressure to the puller until the bearing is removed from the sheave. Be careful not to damage the sheave during this process.
Installing the New Bearing
- Lubricate the Bearing: Apply a thin layer of lubricant to the bearing. The lubricant helps to reduce friction during installation and also provides initial protection against wear. Make sure to use a lubricant that is suitable for the type of bearing and the operating conditions.
- Align the Bearing: Place the bearing on the shaft or in the bore of the sheave, depending on the design. Ensure that the bearing is properly aligned. Misalignment can cause the bearing to wear unevenly and lead to premature failure. You can use a straightedge or a dial indicator to check the alignment.
- Press the Bearing In: If you have a press, place the sheave and the bearing on the press. Apply even pressure to the bearing until it is fully seated in the sheave. If you are using a hammer and drift punches, place the drift punch on the bearing and gently tap the punch with the hammer. Make sure to tap evenly around the bearing to avoid damaging it.
- Torque the Fasteners: If the bearing is secured with fasteners, such as bolts or nuts, use a torque wrench to tighten them to the manufacturer's specified torque. Over - tightening or under - tightening the fasteners can cause problems with the bearing's performance.
Post - installation Checks
- Check the Rotation: Rotate the sheave by hand to ensure that the bearing rotates smoothly. There should be no binding or excessive play. If you notice any issues, such as rough rotation or unusual noises, stop and re - check the installation.
- Inspect for Leakage: If the bearing is lubricated with a grease or oil, check for any signs of leakage. Leakage can indicate a problem with the seal or improper installation.
- Test the Sheave in Operation: If possible, test the sheave in a real - world or simulated operating environment. Monitor the performance of the bearing and the sheave. Look for any signs of overheating, vibration, or abnormal wear.
Types of Wire Rope Sheaves We Offer
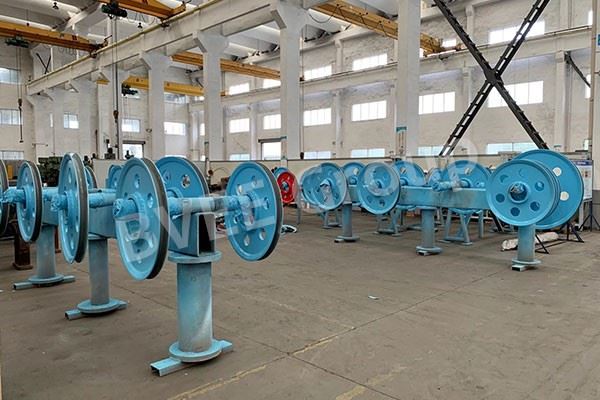
As a wire rope sheave supplier, we offer a wide range of sheaves to meet different needs. For example, our Welding Sheave is designed for applications where high - strength and durability are required. The welding process ensures a strong and reliable structure. Our Hot Rolling Crane Sheave is manufactured using a hot - rolling process, which provides excellent mechanical properties and resistance to wear. And our Catenary Trolley Rope Tensioner Device is a specialized product that helps to maintain the proper tension in the wire rope, ensuring smooth operation.

Conclusion
Installing a bearing in a wire rope sheave is a detailed process that requires attention to detail and the right techniques. By following the steps outlined in this blog post, you can ensure a successful installation and prolong the life of your sheave and bearing. If you have any questions or need further assistance, or if you are interested in purchasing our high - quality wire rope sheaves, please feel free to contact us for procurement discussions. We are committed to providing you with the best products and services to meet your industrial needs.
References
- Machinery's Handbook, 31st Edition, Industrial Press Inc.
- Bearing Installation and Maintenance Guide, SKF Group
- Wire Rope Sheave Design and Application Manual, Various Industry Publications


