

Installing a wire rope sheave is a crucial task that requires careful planning, the right tools, and a good understanding of the process. As a leading wire rope sheave supplier, I've seen firsthand the importance of proper installation for the optimal performance and longevity of these essential components. In this blog post, I'll guide you through the step-by-step process of installing a wire rope sheave, ensuring that you can do it safely and effectively.
Step 1: Gather the Necessary Tools and Materials
Before you begin the installation process, it's important to gather all the tools and materials you'll need. Here's a list of the essentials:
- Wire rope sheave: Make sure you have the correct size and type of sheave for your application. As a wire rope sheave supplier, we offer a wide range of options, including Catenary Trolley Rope Tensioner Device, Hot Rolling Crane Sheave, and STS Crane Forged Sheave.
- Mounting hardware: Depending on the type of sheave and the installation location, you'll need bolts, nuts, washers, and other mounting hardware.
- Safety equipment: Wear appropriate safety gear, including gloves, safety glasses, and a hard hat, to protect yourself during the installation process.
- Measuring tools: A tape measure, level, and caliper will help you ensure that the sheave is installed correctly and aligned properly.
- Lubricant: Apply a high-quality lubricant to the sheave bearings to reduce friction and wear.
Step 2: Choose the Right Location
Selecting the right location for the wire rope sheave is crucial for its performance and safety. Here are some factors to consider:
- Accessibility: Choose a location that is easily accessible for maintenance and inspection.
- Alignment: Ensure that the sheave is aligned properly with the wire rope to prevent excessive wear and damage.
- Clearance: Make sure there is enough clearance around the sheave to prevent interference with other components.
- Load capacity: Consider the weight and tension of the wire rope to ensure that the sheave can handle the load.
Step 3: Prepare the Mounting Surface
Once you've chosen the location for the sheave, it's time to prepare the mounting surface. Here's what you need to do:
- Clean the surface: Remove any dirt, debris, or rust from the mounting surface to ensure a secure fit.
- Check for levelness: Use a level to ensure that the mounting surface is level and flat.
- Drill holes: If necessary, drill holes in the mounting surface for the bolts or other mounting hardware.
Step 4: Install the Sheave
Now it's time to install the wire rope sheave. Follow these steps:
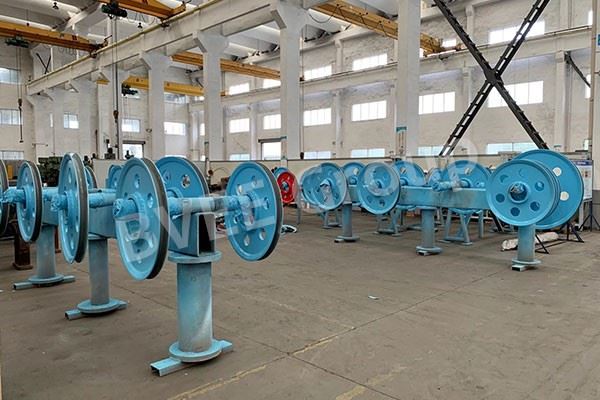

- Position the sheave: Place the sheave on the mounting surface and align it with the holes in the surface.
- Insert the mounting hardware: Insert the bolts or other mounting hardware through the holes in the sheave and the mounting surface.
- Tighten the nuts: Use a wrench to tighten the nuts on the bolts until they are snug but not too tight. Over-tightening can damage the sheave or the mounting surface.
- Check the alignment: Use a level and a caliper to check the alignment of the sheave. Make any necessary adjustments to ensure that the sheave is aligned properly with the wire rope.
Step 5: Install the Wire Rope
After the sheave is installed, it's time to install the wire rope. Here's how:
- Thread the wire rope: Thread the wire rope through the sheave groove, making sure it is centered and aligned properly.
- Secure the wire rope: Use clamps or other fastening devices to secure the wire rope to the sheave. Make sure the wire rope is tight and secure to prevent slippage.
- Check the tension: Use a tension gauge to check the tension of the wire rope. Adjust the tension as needed to ensure that it is within the recommended range.
Step 6: Lubricate the Sheave
Once the wire rope is installed, it's important to lubricate the sheave to reduce friction and wear. Here's what you need to do:
- Apply lubricant: Apply a high-quality lubricant to the sheave bearings and the groove of the sheave.
- Spread the lubricant: Use a brush or a cloth to spread the lubricant evenly over the surface of the sheave.
- Wipe off excess lubricant: Use a clean cloth to wipe off any excess lubricant from the sheave.
Step 7: Test the Sheave
After the installation is complete, it's important to test the sheave to ensure that it is working properly. Here's what you need to do:
- Check the alignment: Use a level and a caliper to check the alignment of the sheave again. Make any necessary adjustments to ensure that the sheave is aligned properly with the wire rope.
- Check the tension: Use a tension gauge to check the tension of the wire rope again. Adjust the tension as needed to ensure that it is within the recommended range.
- Operate the sheave: Slowly operate the sheave to check for any signs of noise, vibration, or other problems. If you notice any issues, stop the operation immediately and investigate the cause.
Step 8: Maintain the Sheave
Proper maintenance is essential for the long-term performance and reliability of the wire rope sheave. Here are some tips for maintaining your sheave:
- Inspect the sheave regularly: Check the sheave for signs of wear, damage, or corrosion. Replace any worn or damaged components immediately.
- Lubricate the sheave regularly: Apply lubricant to the sheave bearings and the groove of the sheave at regular intervals to reduce friction and wear.
- Clean the sheave regularly: Remove any dirt, debris, or rust from the sheave to prevent damage and ensure a smooth operation.
- Follow the manufacturer's recommendations: Refer to the manufacturer's instructions for specific maintenance requirements and recommendations.
Conclusion
Installing a wire rope sheave is a complex task that requires careful planning, the right tools, and a good understanding of the process. By following the steps outlined in this blog post, you can install a wire rope sheave safely and effectively, ensuring that it performs optimally and lasts for a long time. As a wire rope sheave supplier, we are committed to providing high-quality products and excellent customer service. If you have any questions or need assistance with your wire rope sheave installation, please don't hesitate to contact us. We look forward to helping you with your procurement needs and discussing how our products can meet your specific requirements.
References
- "Wire Rope Sheave Installation Guide" - Manufacturer's Manual
- "Safety Guidelines for Wire Rope Sheave Installation" - Industry Standards Document
- "Maintenance Tips for Wire Rope Sheaves" - Technical Bulletin


